Jekyll on your root domain on CloudFront CDN
Maybe like me, you read about the Obama campaign’s $250 million fundraising platform and wanted the same high-performance for your own site?
I’ve used Jekyll for a while, but there was always one thing that prevented me from using Amazon S3 / CloudFront to host it.
The deal-killer - WWW
To use amazon s3 or cloudfront for hosting, you have to use a CNAME. This basically means you need to have blog.mydomain.com or www.mydomain.com to host there.
I hate using “www” in front of a website. It’s a pet-peeve but a big one and I didn’t want to host with s3 / cloudfront because of that.
Enter the ANAME
ANAME is a proprietary, non-standard DNS record type from DNS Made Easy learn more. It allows you to point the domain apex “domain.com” to cloudfront.
Basically, for $29.95 a year, you can host up to 10 domains there and not look like you’re living in 1997 with your “www”. Pretty sweet. I signed up yesterday.
So now you can set up an ANAME on the domain apex and it looks like we can use Cloudfront to serve content, let’s migrate the blog with zero-downtime.
Get Amazon S3 Set up
Add your bucket
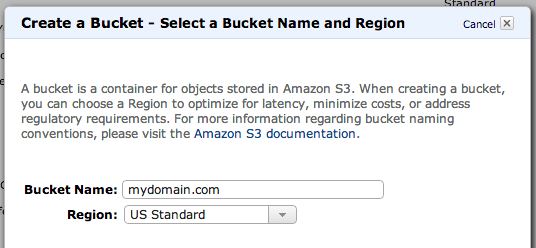
Make sure you name the bucket “yourdomain.com”
Set up your policy
Use this gist as a guide.
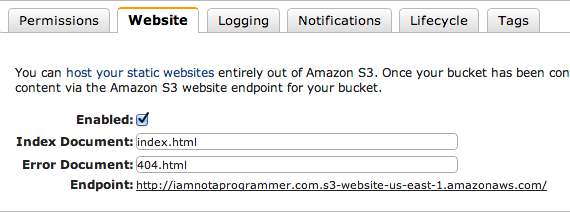
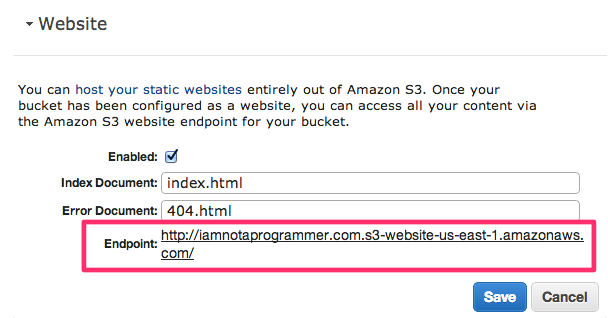
Set your bucket up for static hosting
Yours should look pretty similar to this:
On to CloudFront
CloudFront is Amazon’s CDN. Basically, by putting content on CloudFront, you can achieve a faster experience for people wherever they are in the world. It sends them data from the closest datacenter.
Create a distribution
You’ll notice that when you create a distribution, and select the origin, they have a list of your s3 buckets:
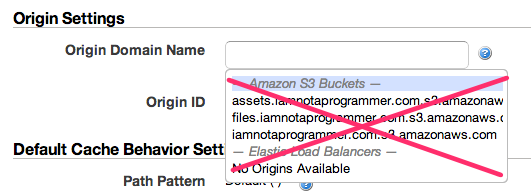
DONT pick one of these!
You need to use your website endpoint from S3.
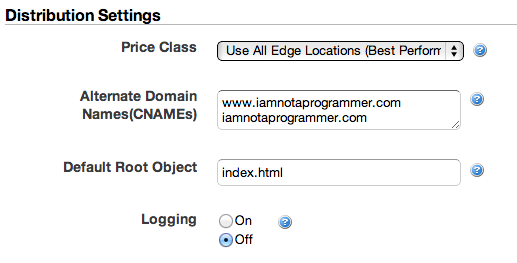
Distribution Settings
It seems like you need to set the root object again. Not sure what happens if you dont. You’ll also want to make sure to add “domain.com” and “www.domain.com” as your CNAMEs.
After you set up your CloudFront distribution, copy the “domain”. You can find that by clicking the info icon. You’re gonna need it for the DNS.
Set up DNS Made Easy
Create your DNS made easy account
Feel free to use my afilliate link (or not)
Add your ANAME record to point to your cloudfront domain name i.e. d20l41xryjmszl.cloudfront.net (make sure you add a trailing .)
Also, you should set the TTL to 60 seconds.
Before you switch your registrar, let’s make sure content is up.
Synchronizing content to S3
Install S3Cmd
You could install s3cmd with homebrew, but the stable version doesn’t support expiring the cache on cloudfront. The development version does, but doesn’t support expiring the cache for static sites… so…
Jose Prio forked S3Cmd to support our use case well… so let’s use his fork.
git clone https://github.com/joseprio/s3cmd.git
cd s3cmd
sudo python setup.py install
Set up your access key and secret
s3cmd --configure
Follow the prompts to add your key and secret.
Set up your publish script
Then, I created a shell script: publish.sh one level up from my site. My generated site is in “public” but yours will probably be in _site
Publish.sh:
s3cmd sync --delete-removed --acl-public --reduced-redundancy --cf-invalidate public/ s3://iamnotaprogrammer.com/ --verbose
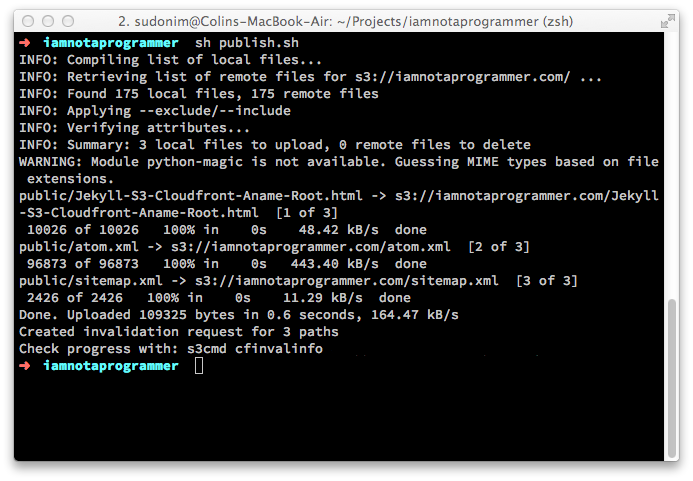
Publish!
sh publish.sh
You should see some success like this:
Test your cloudfront is working
Now if you go to the cloudfront address you saved earlier, you should see your site.
Switch your DNS
Last step, assuming everything went well is to switch your DNS provider on your registrar to DNS Made Easy.
And that’s it. You’ve got your static site hosted on a CDN and it’s on the domain apex.